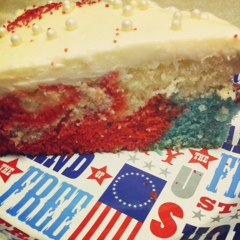
When contemplating what to make for July 4th I came across this tie dye cake. All the berry desserts are great but I LOVE cake! The cake was simple to make and it tasted very sweet!
It was a joint colaboration with my mom. She mixed up the cake and dyed part of the batter red. I dyed another portion of the batter blue, mixed up the icing, and decorated the cake with white sugar pearls and red sugar. Always more fun when you have someone to bake with. We considered slicing the cake in half as Sally of Sally's Baking Addiction offered as a suggestion. I mean who in my family refuses more frosting?!? The cake started to crack a little in the middle while cooling (we may have taken it out of the pan too soon - we are eager eaters). Thus we went with the single layer and boy were we glad. The frosting is sooooo rich! My mom has added this recipe to her official cake line up. Anyone else have a cake line up or a few go to recipes? We also love Back in the Day's recipe.


I hope everyone had a fabulous 4th of July! We did despite the rain. Cake makes everything better. You should consider making this for your next festive get together or even plain ole' vanilla will be just wonderful!
How to Make a Tie-Dye Cake
Serves 10. Cake stays fresh covered at room temperature or in the refrigerator for 5 days.
Ingredients
- Recipe for homemade vanilla cake (leave out the sprinkles in the batter)
- Food coloring (I have no substitutes for this)
- Recipe for homemade vanilla frosting (We had extra frosting left over!)
- Sprinkles for decoration
Instructions
- Preheat oven to 350F degrees. Spray 9x2 inch round cake pan (or 9-inch springform pan) with nonstick spray.
- Make the cake batter according to my directions (see link in the ingredient list). Divide the white batter into three separate bowls. Grab your food coloring and dye your batters any color you choose. I used 10 drops of red, 10 drops of blue, and left the third bowl plain. Place a separate spoon in each bowl. Scoop large spoonfuls of each batter and layer them into prepared baking pan. It does not have to be pretty. The colors will create a tie-dye effect. See photo above for how my cake looked prior to baking.
- Bake for 20 minutes. Cover loosely with aluminum foil (loosely to avoid the top from sticking to the foil). Bake for 13-17 more minutes or until a toothpick inserted in the center comes out clean. Allow to cool.
- Make the frosting according to my directions (see link for frosting in ingredient list). Frost cooled cake and decorate as desired.
Notes
Interested in making a layer cake? You could: (1) Bake the cake as indicated and slice the cake horizontally to create two layers. Double the frosting if desired. (2) Double the cake recipe and bake in two separate 9-inch cake pans for 1 extra tall layer cake. Double the frosting recipe as well.
No comments:
Post a Comment