Tuesday, July 30, 2013

Biscones

Last fall during a trip to Savannah, GA I checked out Back in the Day bakery. I learned about this bakery and one of owners, Cheryl Day, while watching a couple of episodes of Paula Deen on the food network. Before leaving I read up on the bakery and knew I had to go. My mom and I loved it! The cupcakes were to die for and the bakery had this adorable vintage motif. Of course we bought the cookbook! Mom has made the old fashioned cupcakes a few times. In an effort to bake with blueberries I decided to try out the biscones. At first I was not quite sure what a biscone is but I know I like biscuits and scones so why not combine them???

 
It is a one bowl recipe that could not be easier. Then you just scoop them on a baking sheet lined with parchment paper - no rolling - no shaping!!! I baked them for 23 minutes which was too long because some of the bottoms browned. When I checked them though at 20 minutes they still looked gooey. Nope, apparently that is  the texture because they looked the same 3 minutes later.  Not quite golden brown like the recipe says but fully baked. Baking times will vary so word to the wise do not expect the biscones to be as dry as a biscuit nor a scone.

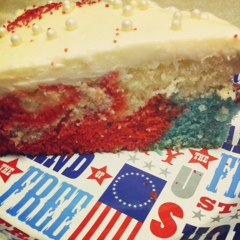
The cookbook gives you the option to make buttermilk biscones or add blueberries and whip up a lemon glaze. Blueberries and lemon please! There is probably half a gallon still in my freezer from picking earlier this month. It takes a couple of bites before your brain can process what you are eating. I had a hard time placing the yummy sweet taste. The recipe calls for cardamom but I opted to substitute with equal parts cinnamon and nutmeg. I think this may have been the sweet deliciousness. My dad liked these which is saying a lot because he is not big on some pastries...umm like scones.


Ingredients

 
1 1/2 cups unbleached all-purpose flour

1 1/2 cups cake flour (not self-rising)

1/4 cup granulated sugar

2 tablespoons baking powder

Salt

1/4 teaspoon ground cardamom

1/2 pound (2 sticks) cold unsalted butter, cut into 1/2-inch pieces

1/2 cup fresh or frozen blueberries

1 1/2 cups buttermilk, plus more as needed

1 large egg

3/4 cup confectioners' sugar

Zest and juice of 1 lemon
 

Directions

 
1. Preheat the oven to 375° and line two baking sheets with parchment paper.

2. In a large mixing bowl, whisk the all-purpose flour with the cake flour, granulated sugar, baking powder, 3/4 teaspoon of the salt and cardamom until combined. Using a pastry cutter or two knives, work in the butter until you have various-size pieces ranging from sandy patches to pea-size chunks and some larger bits as well. Gently stir in the blueberries.

3. Gradually pour in the buttermilk and gently fold the mixture until there are no bits of flour remaining in the bottom of the bowl. If the dough seems dry, add a little more buttermilk until it is moist and slightly sticky.

4. Using your hands, gently pat down the dough until it resembles a loaf of bread. Using a large ice-cream scoop, scoop mounds of the dough onto the prepared baking sheets, arranging them about 1 inch apart. Lightly tap down the tops of the biscones with the scoop.

5. In a small bowl, lightly beat the egg with a pinch of salt. Brush the tops of the biscones liberally with the egg wash. Bake for 20 to 25 minutes, rotating the baking sheets halfway through, until the biscones are golden and fully baked. Remove from the oven and let cool for 10 minutes.

6. Meanwhile, in a small bowl, whisk the confectioners' sugar with the grated lemon zest and juice until smooth and creamy. Drizzle over the biscones and serve immediately.
 

Put some SOUTH in your mouth y'all!!!!!!


Wednesday, July 17, 2013

Roasted Blueberry Cupcakes


Happy National Blueberry Month!!! (Now you all know that July is National blueberry month..in case you did't already.) I picked blueberries at Washington Farms over the July 4th weekend. Not quite sure why my mom and I enjoy this so much but we do. This year we decided to go early in the morning so we would have a chance to pick blackberries too. It was my first time picking blackberries and man was it fun. I'm undecided about baking anything with blackberries. Right now I'm loving them with yogurt, granola, and some honey.


Back to the blueberries and recipe at hand. These recipes on the Bean Town Baker blog popped up before I went blueberry picking and I made a mental note that I had to see these beautifully purple cupcakes for myself. Wow! The color is amazing!

I was a little apprehensive about roasting blueberries in fear that my oven would be a mess. I placed the cute little guys on some aluminum foil and it was an easy clean up. Easy as in crinkle up the foil and throw it away! No harm done to the cookie sheet or oven. It was lots of fun watching the creamy batter turn purple. Now I will say that the bottom of my cupcake wells are slightly purple. I baked the cupcakes in purple liners but I have used these Wilton liners before in red with no problem. Still scratching my head on this one. My attempt at this recipe yielded 15 cupcakes. I'm sure I could have produced one more..oh well.


The only change I made to the recipe was that I substituted almond extract for vanilla. Totally forgot to pick up vanilla extract at the grocery store. Whoops!

This cream cheese frosting recipe is to die for! Very sweet!!! (And it was enough to frost all 15 cupcakes with a little extra left for sampling.) My friend asked if there was extra frosting because she wanted to eat the frosting by itself. Silly girl...no leftovers...I took care of that. The girls in my small group noted that the cupcake is heavy and cake like. I agree with them that the consistency is like no other cupcake I have baked before. Must be that roasted blueberry goodness. Only had a few takers during small group so I brought the rest in to work. A coworker e-mailed me to say the cupcake is delicious. This made me think of Julia Child, "It's delicious!" On that note, do not feel like you have to go all out and pick fresh blueberries. Store bought berries will be just fine and then you too can watch the magical transformation into PURPLE batter and cupcakes.

Roasted Blueberry Cupcakes with Cream Cheese Frosting

Roasted blueberries have a strong sweet flavor that comes through perfectly in these cupcakes
Yield: 16 cupcakes

Ingredients:

1 1/2 cups fresh blueberries
1 cup sugar
1/2 cup butter
2 eggs
2 tsp vanilla
1 3/4 cups flour
1 1/4 tsp baking powder
1/4 tsp salt
2-3 Tbsp milk
1 batch Cream Cheese Frosting

Directions:

Preheat oven to 350 degrees F.
Spread blueberries on a baking sheet (with sides) and roast for 10-15 minutes, or until berries start to burst. Remove from oven and let cool.
Beat butter and sugar together in the bowl of an electric mixer until fluffy, about 4-5 minutes.
Add eggs and vanilla and mix until combined, another 2-3 minutes.
Add flour, baking powder and salt with the mixer on low speed, then gradually increase speed.
Scrape in blueberries and beat on medium speed until the berries break down – about 2-3 minutes. At this point, the berries most likely have enough liquid that you only need to add a small amount of milk to the batter.
Begin adding 1 tablespoon of milk at a time and beat with the mixer until the batter is smooth. You definitely want it to be cake batter and not dough. (My batter took 2 Tbsp of milk)
Pour into cupcake liners, filling 2/3 of the way full, and bake for 18-22 minutes or until cake is set. Let cool completely, then frost.
 

Cream Cheese Frosting

Yield: 1 cup (enough to frost 12 cupcakes)

Ingredients:

4 oz cream cheese at room temp
1/2 stick (4 Tbsp) butter at room temp
1/2 Tbsp vanilla
1 1/2-2 cups powdered sugar

Directions:

Place the cream cheese in the bowl of your mixer. Beat on medium-high until completely smooth, 3-4 minutes. Add the butter and continue to cream until fluffy.
Add vanilla extract. Slowly add powdered sugar (1/4 cup at a time) until desired consistency is reached.


Monday, July 8, 2013

Tie Dye Cake


When contemplating what to make for July 4th I came across this tie dye cake. All the berry desserts are great but I LOVE cake! The cake was simple to make and it tasted very sweet!

It was a joint colaboration with my mom. She mixed up the cake and dyed part of the batter red. I dyed another portion of the batter blue, mixed up the icing, and decorated the cake with white sugar pearls and red sugar. Always more fun when you have someone to bake with. We considered slicing the cake in half as Sally of Sally's Baking Addiction offered as a suggestion. I mean who in my family refuses more frosting?!? The cake started to crack a little in the middle while cooling (we may have taken it out of the pan too soon - we are eager eaters). Thus we went with the single layer and boy were we glad. The frosting is sooooo rich! My mom has added this recipe to her official cake line up. Anyone else have a cake line up or a few go to recipes? We also love Back in the Day's recipe.


I hope everyone had a fabulous 4th of July! We did despite the rain. Cake makes everything better. You should consider making this for your next festive get together or even plain ole' vanilla will be just wonderful!
 
How to Make a Tie-Dye Cake
Serves 10. Cake stays fresh covered at room temperature or in the refrigerator for 5 days.
 
Ingredients
Instructions
  1. Preheat oven to 350F degrees. Spray 9x2 inch round cake pan (or 9-inch springform pan) with nonstick spray.
  2. Make the cake batter according to my directions (see link in the ingredient list). Divide the white batter into three separate bowls. Grab your food coloring and dye your batters any color you choose. I used 10 drops of red, 10 drops of blue, and left the third bowl plain. Place a separate spoon in each bowl. Scoop large spoonfuls of each batter and layer them into prepared baking pan. It does not have to be pretty. The colors will create a tie-dye effect. See photo above for how my cake looked prior to baking.
  3. Bake for 20 minutes. Cover loosely with aluminum foil (loosely to avoid the top from sticking to the foil). Bake for 13-17 more minutes or until a toothpick inserted in the center comes out clean. Allow to cool.
  4. Make the frosting according to my directions (see link for frosting in ingredient list). Frost cooled cake and decorate as desired.
Notes
Interested in making a layer cake? You could: (1) Bake the cake as indicated and slice the cake horizontally to create two layers. Double the frosting if desired. (2) Double the cake recipe and bake in two separate 9-inch cake pans for 1 extra tall layer cake. Double the frosting recipe as well.